Changing A One Piece Stoma Bag
- Wash hands
- If using a drainable or urostomy bag empty the contents of your stoma bag into the toilet
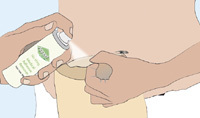
- Apply a small amount of medical adhesive remover spray or wipe on top and around the edge of the flange to be removed and wait a few seconds
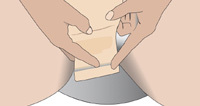
- Gently peel back the flange, holding the skin above taut to ease removal. Apply additional medical adhesive remover if required
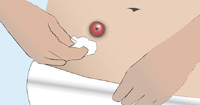
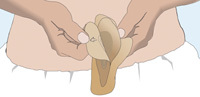
- Remove excess soiling on the stoma and surrounding skin with a dry, non-woven wipe
- Use water to wet a non-woven wipe and wash stoma and surrounding area, then dry thoroughly
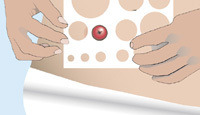
- If necessary, check the size of your stoma using a measuring card
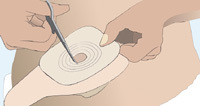
- If your pouch needs adjusting, cut a hole to the required size using a pair of pouch cutting scissors*
- Remove the protective cover from the adhesive flange/baseplate on the fresh stoma bag
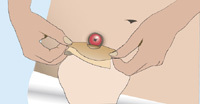
- Fit bag from the bottom and smooth over the adhesive from the stoma to the edge, ensuring there are no creases that might cause leakage
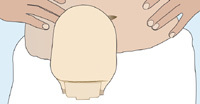
- Hold in place with your hand for 30 seconds to a minute, as the warmth improves the adhesion to your skin
- If using a drainable or urostomy pouch make sure the opening or tap is securely closed before applying the new pouch
* Pouch cutting scissors are available free of charge - or a pouch cutting service is available, also free of charge - to registered users of the SecuriCare home delivery service.